


Hey! I’m Brittany, and the 4 new features I cover in this blog post are all about images.
Now you can upload, organize and display your pictures faster and more efficiently with the all-new image category section and multi-image upload options to the image library and image carousel.
We’ve also added an image hover state option which allows you to display an additional image when a visitor hovers over images on your site. Want to see how these new features work? I’ll show you!
Bulk Uploads (Image Library & Image Carousel)
Previously, whenever you wanted to upload images into Zipify Pages you had to do it one by one. As ZP users ourselves, we knew first hand how time consuming this process was. Le sigh!
But now with bulk uploads, you can upload multiple images all at once, freeing up time to accomplish more in your day.
How to Upload Multiple Images to Image Library
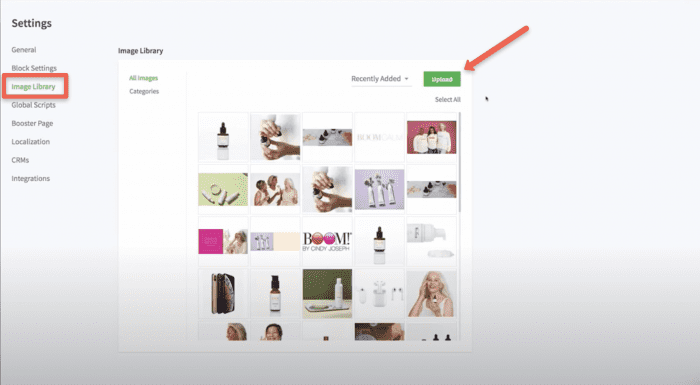
- Go to Settings > Image Library and click ”Upload”. (pic.1)
- Select the images from your device and complete the upload.
(pic.1)
How to Upload Multiple Images to Image Carousel
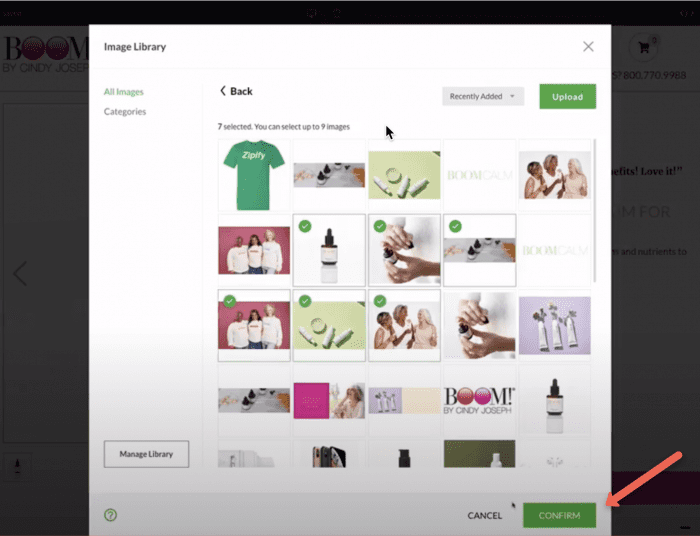
- Inside the page editor, click on the Dynamic Buy Box image element.
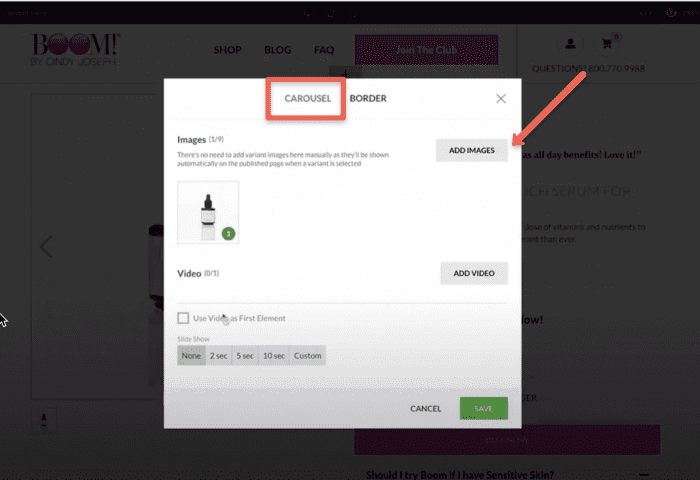
- Under the pop-up’s Carousel section, click “Add Images”. (pic.2)
- Select the images you want to add and click “Confirm”, then save. (pic.3)
(pic.2)
(pic.3)
Image Categories
Similar to the Page Groups feature, Image Categories allow you to organize and group your images together in one convenient location.
How to Create a New Category in “All Images”
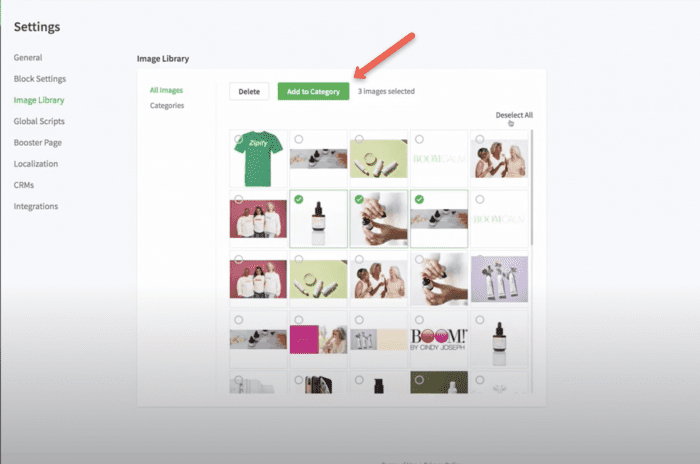
- Go to Settings > Image Library > All Images.
- Select the images you want to upload and click “Add to Category”. (pic.4)
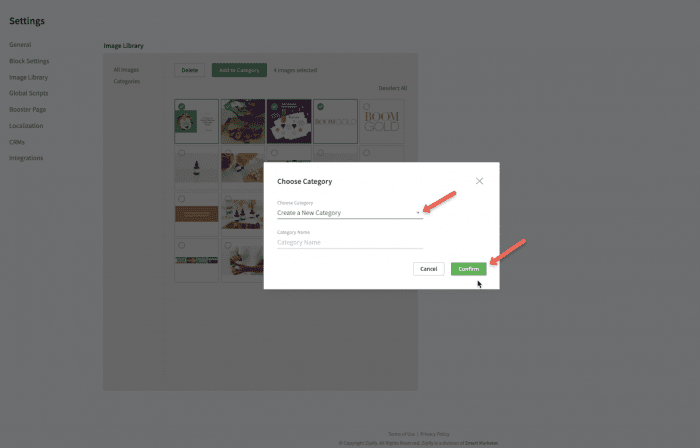
- Name and create a new category or select an existing one, then confirm. (pic.5)
(pic.4)
(pic.5)
How to Create a New Category in “Categories”
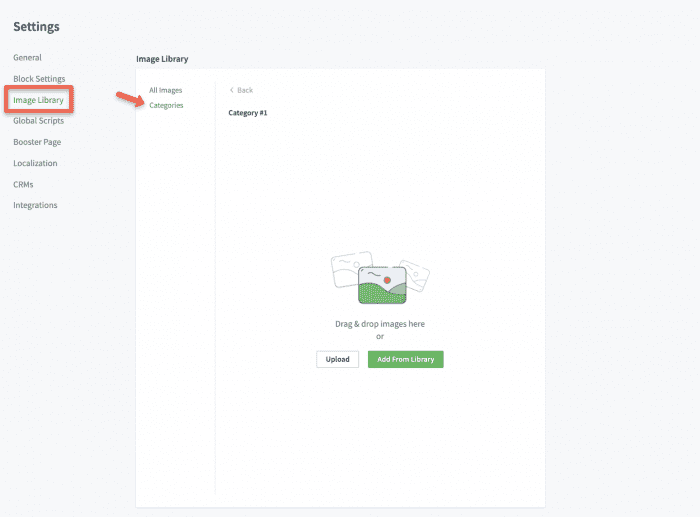
- Go to Settings > Image Library > Categories
- Click “New Category” and name it. (pic.6)
- Click “Create”.
- Drag and drop, upload new images, or add them from the library to fill the new category. (pic.7)

(pic.6)
(pic.7)
For more information about Image Categories, please visit The Image Library help section.
Image Hover State Options
While the last 3 features focused on the backend of your store, the final new feature improves the frontend.
Now, when a user hovers over an image on your site, a secondary image can show in its place. This is great for when you want to display multiple angles of your product, an ingredients list, or a shot of your product in use.
How to Add a Hover Image to the Image Element
- Inside the page editor, click on the image element.*
Select to include a “Hover Image” and save. (Hover State is turned off by default.) (pic.8)
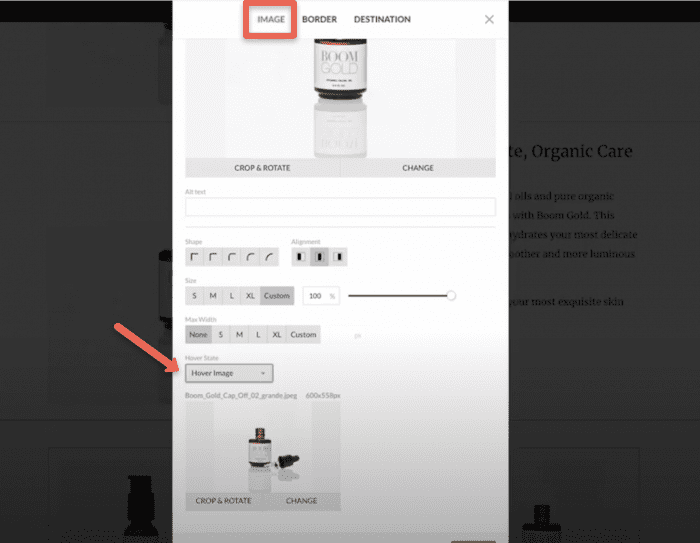
(pic.8)
*Excludes the image carousel and icon images. Learn more here. I’m Brittany — thanks for reading!
Not a Zipify Pages User? Start Your Free 14-day Trial
If you’re not a Zipify member, we want to invite you to join our community!
Visit the Shopify App Store or zipifypages.com to start your free 14-day trial.
If you are a Zipify Pages user, would you do us a huge favor and leave an honest review in the Shopify App Store?
It really helps us connect with other business owners just like you!
Try Zipify Pages