Copy, images and videos are the most important creative elements when building an online store, and between the 3 of them, images are the most impactful in terms of engagement.
If you look at which image layout is best, you’ll see that image carousels out-perform both single images and single videos.
The same goes for social platforms: Facebook ads get 10x higher engagement when they include carousels and Instagram users are 75% more likely to click over to a site after engaging with one.*
Now, you can add this engagement booster to every page of your Shopify store with our newest block for Zipify Pages:
The Image Carousel Block!
To learn just how easy it is to use this new block, keep reading (or watch the video above).
Working with the Image Carousel Block
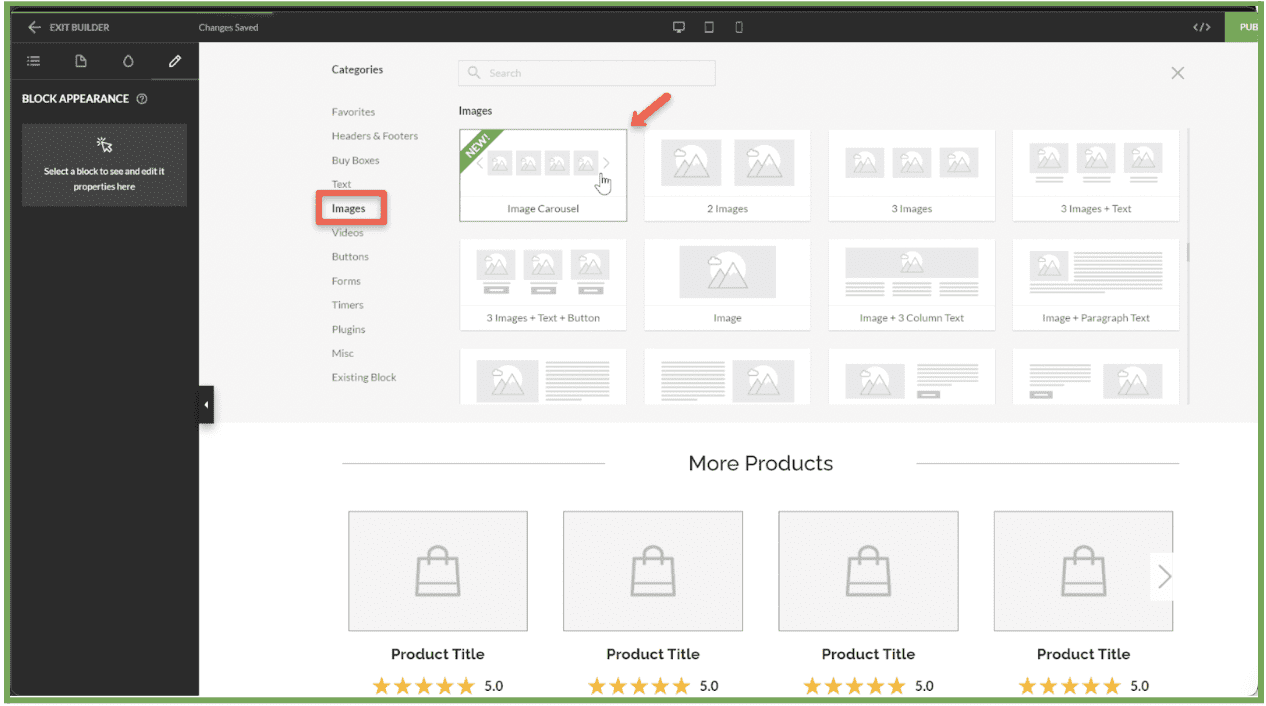
To begin using this new block, go to the page builder and open the Block Library. Navigate to the Images category and select the Image Carousel Block:
The Image Carousel popup will appear with two subsections: Images and Display:
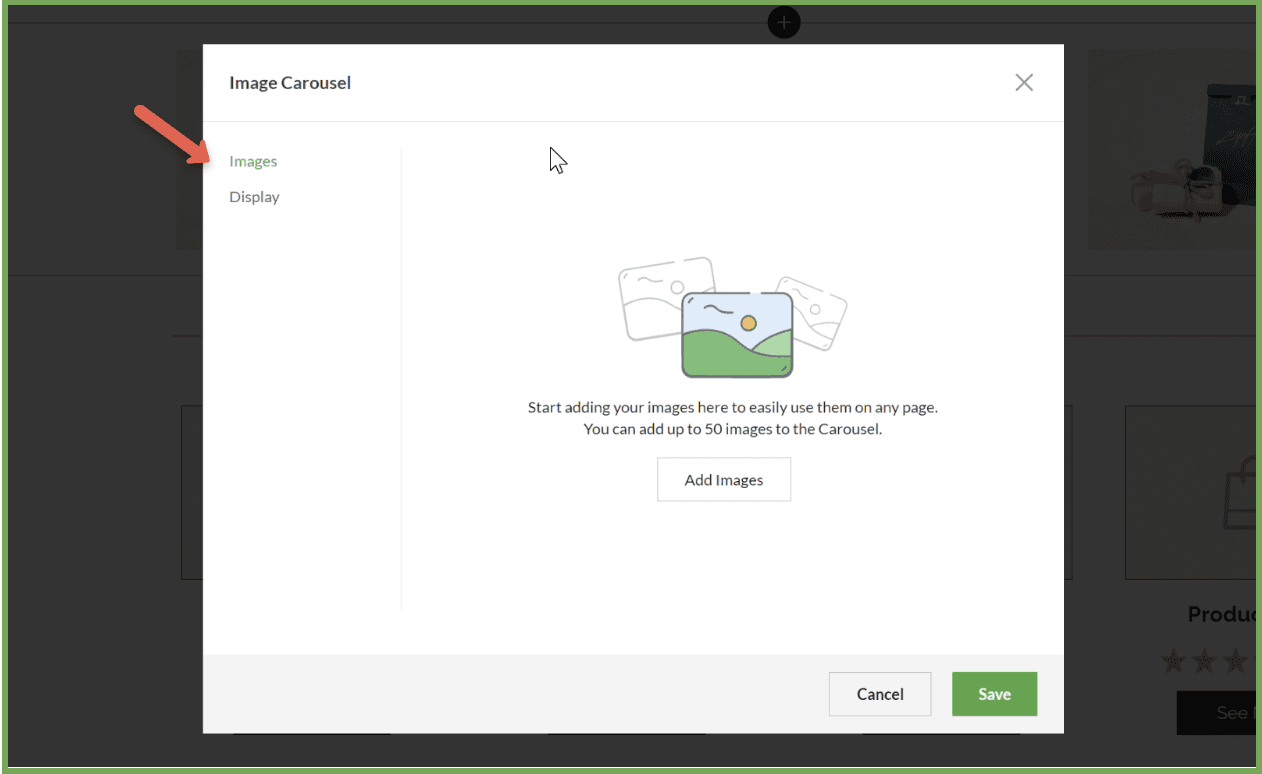
Under the Images sub-section, clicking “Add Images” will open the Images Library:
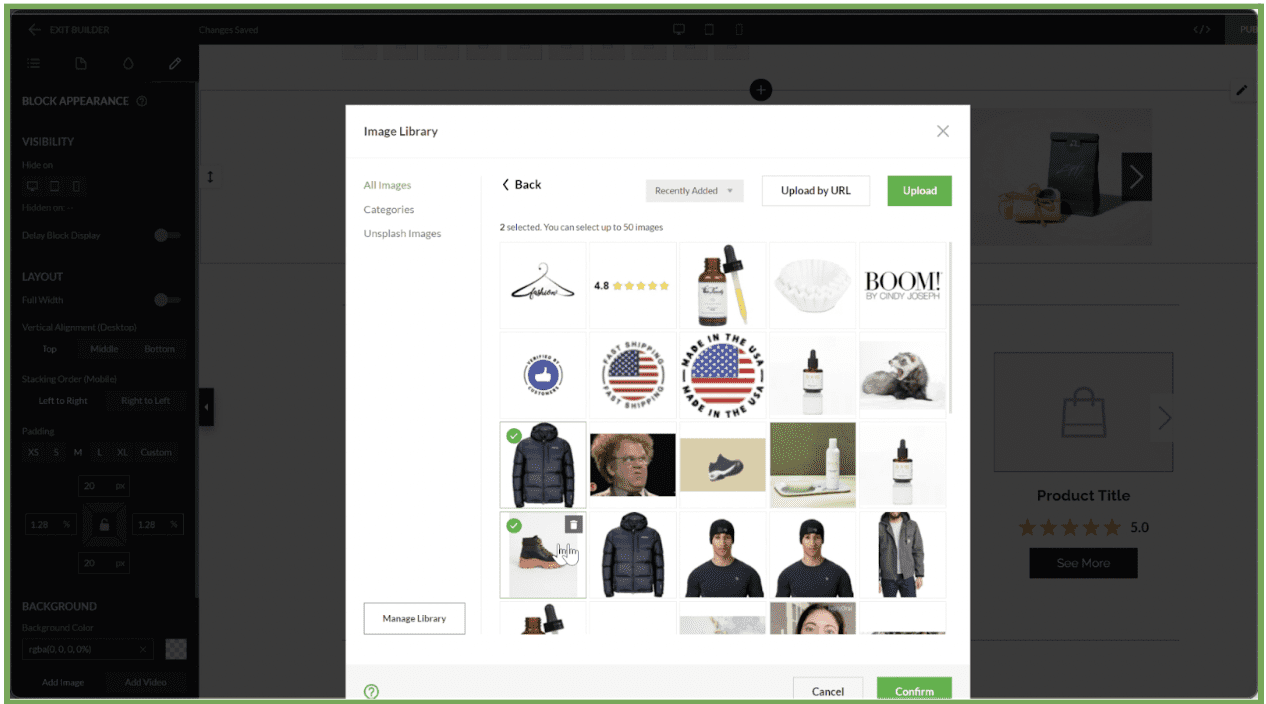
The Image Library is where you can add, remove and organize the images selected for your carousel.
You can use previously uploaded images, upload new images from your device or via URL, or you can use some of the free images from the Unsplash Images library (add up to 50 images total). Learn more about the Images Library in the Zipify help articles.
After selecting your images, go to the Display sub-section of the carousel popup:
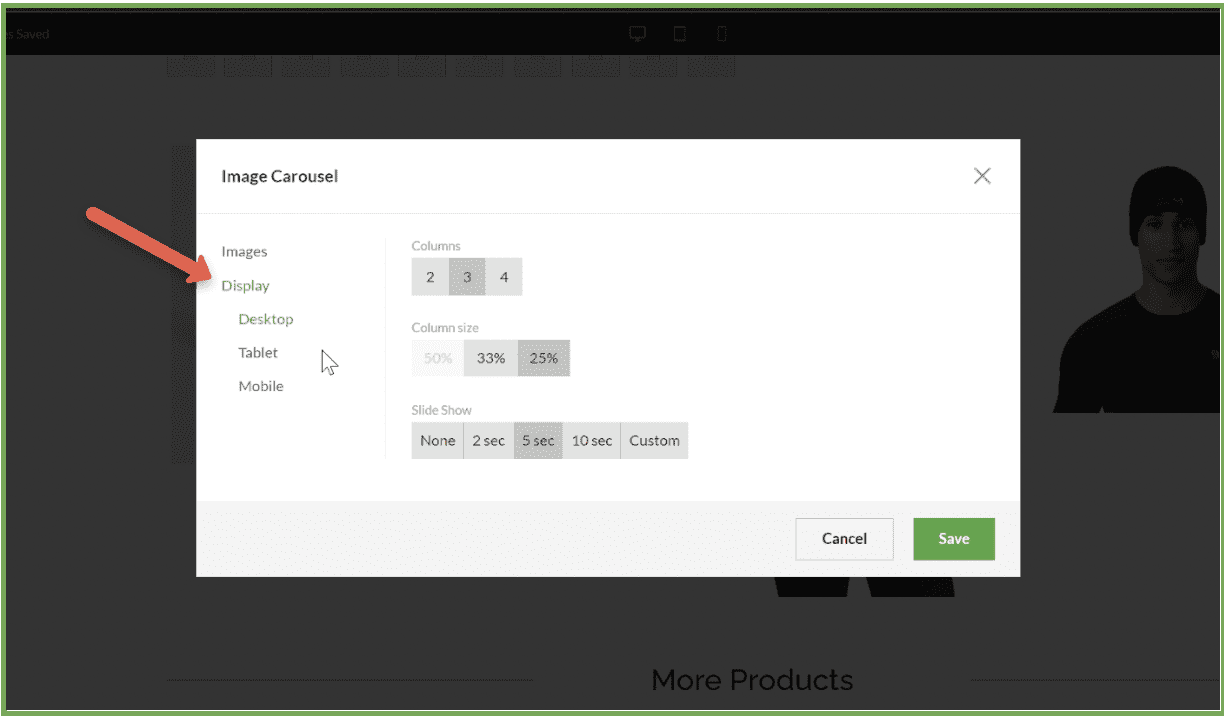
This section lets you set the number of images first shown in the carousel for every type of device available:
Column – Sets the number of images first seen in the carousel (desktop/tablet/mobile).
Column Size – Sets the sizing of images in the image slide (desktop/tablet).
Slide Show – Sets duration between image slides in the slide show (desktop only).
To further customize the carousel, return to the page builder and click on one of the newly added images. The Left-Side Tab will appear with options to:
- Crop the image
- Set a destination
- Style the image shape and border
- Add a hover state animation, and more
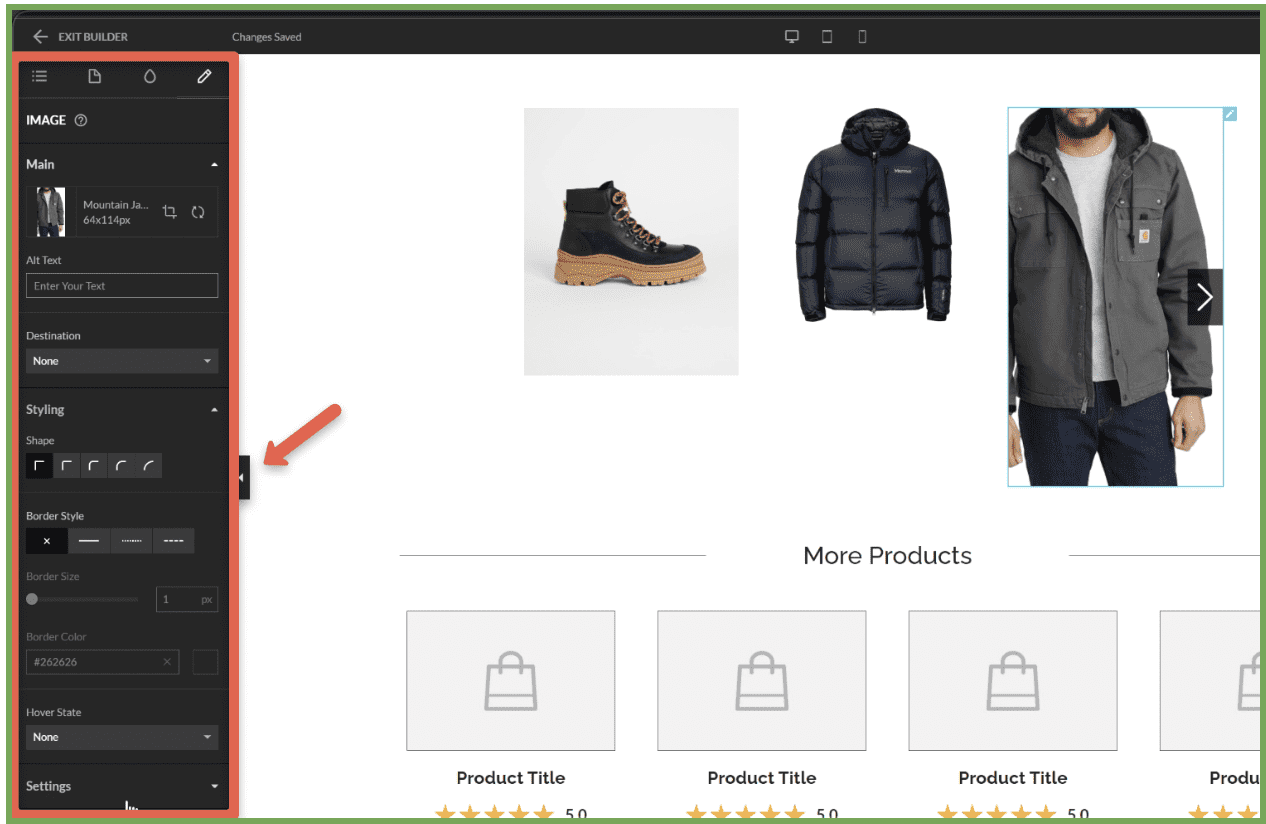
Lastly, you can edit the Block Appearance by clicking on the white spaces of the carousel or by clicking the pencil icon top-right of the block.
The Block Appearance settings will also appear in the Left-Side Panel — displaying options to adjust the device visibility, width, alignment, padding, and background color of the block:

That’s it, give this new block a try for yourself and let us know how well it worked for you!
Other Image Carousel Options in Zipify Pages
If you find the Image Carousel Block doesn’t fit the page you’re working on, the following blocks are great alternatives for using image carousels:
- Buy Boxes: This is the most popular location for an image carousel. That’s because carousels further the goal of the buy box, which is to convert the sale. The following buy boxes support image carousels: Dynamic Buy Box, Dynamic Bundle Offer, Product Listing 1 and Product Listing 3.
- HTML Block: Some of our more tech-savvy users prefer to code, create, and customize their own image carousels. That’s where the HTML block comes in, by giving these users an easy way to bring their creations to life on their pages through HTML or 3rd-party services. Visit the HTML help documentation to learn more.
Ready To Start Using Zipify Pages’ Image Carousel?
Already a Zipify Pages member? This block is available to you now, inside the Block Library. And please, leave us an honest review in the Shopify App Store. It helps us create winning relationships with other business owners just like you.
Not a member? Go to ZipifyPages.com to learn more about the app and start your free 14-day trial.
Thanks for reading!

