***This post features OCU Legacy which is no longer supported by Zipify or Shopify. Click here if you’re looking for up to date information about OneClickUpsell***
Amazon Pay is now available on the OCU checkout.
In this blog post, I’ll get you up to speed on this new payment option, including why you should offer it on your cart and how to set it up for your OneClickUpsell account.
Why Use Amazon Pay?
Amazon Pay is a fast, easy and trusted way for your customers to make online purchases by using the payment and shipping information stored in their Amazon accounts.
Fast & Easy: Amazon now has over 100 million Prime members in the U.S. alone, almost half of whom make a purchase at least once a week. Now all of these people — plus all non-Prime Amazon users — can make one-click upsell purchases on your Shopify store using the credit card and shipping information saved in their Amazon account (and without searching for their wallets).
Trusted: 3 big factors behind Amazon’s success is their consistent user experience, their secure network and their reliable shipping. When customers see that “Amazon Pay” button on your checkout, they will associate that brand credibility with their purchase.
Now, let’s take a look at how to set up Amazon Pay on your OCU checkout.
How to Set Up Amazon Pay for OCU
Thanks to our new integration, it’s easy to enable Amazon Pay on your OCU checkout.
1. Register Your Application
First, navigate to your Amazon Pay account to register a new application.
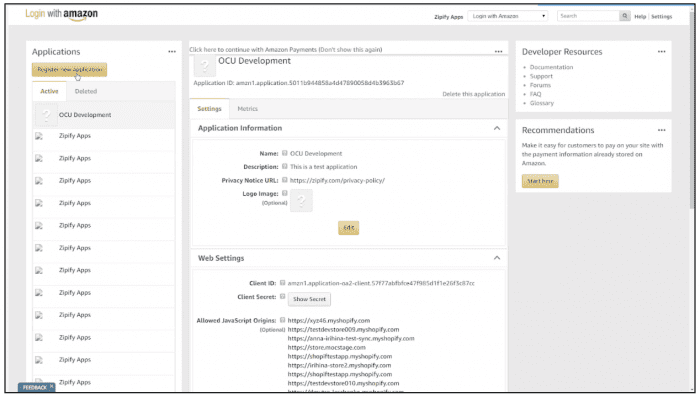
Fill out the application form and click “Save”.
After the Application is successfully created, click the “+” icon under the Web Settings section and then click “Edit”.
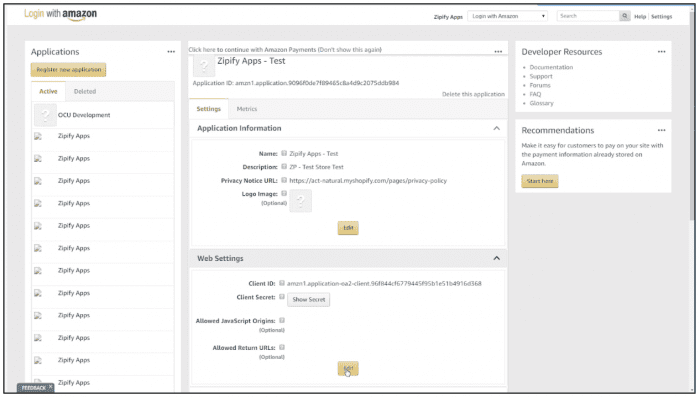
In the “Allowed JavaScript Origins” field, add all of your store domains in the following format: https://store_domain.com
In the “Allowed Return URLs” field, add all of your store domains in the following format: https://store_domain.com/apps/secure-checkout/amazon/callback
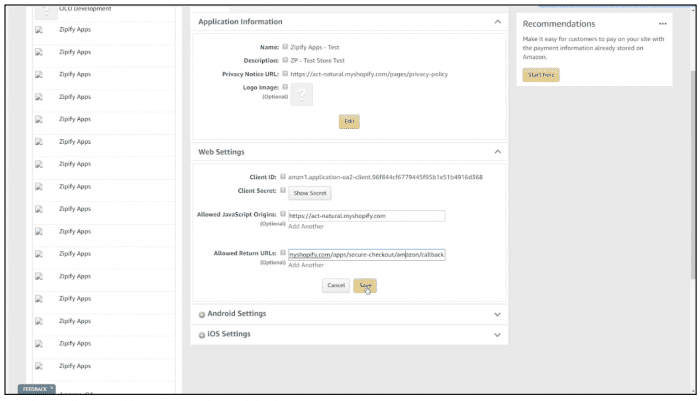
Click “Save” and the Application is all set up!
2. Insert Your API Keys
Next, you’ll have to get the API keys that you’ll need to add to the OCU app.
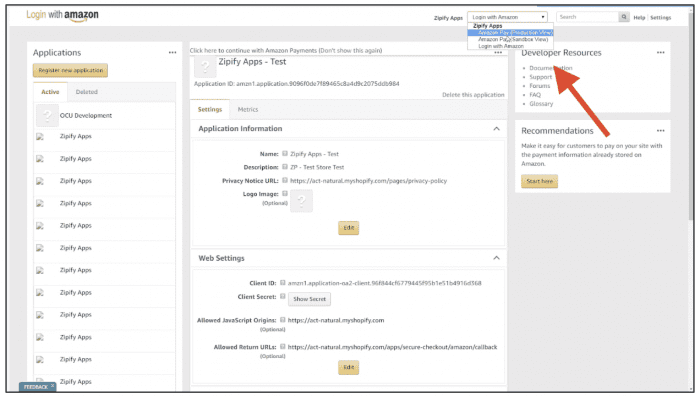
Navigate to the “Amazon Pay (Production View)”…
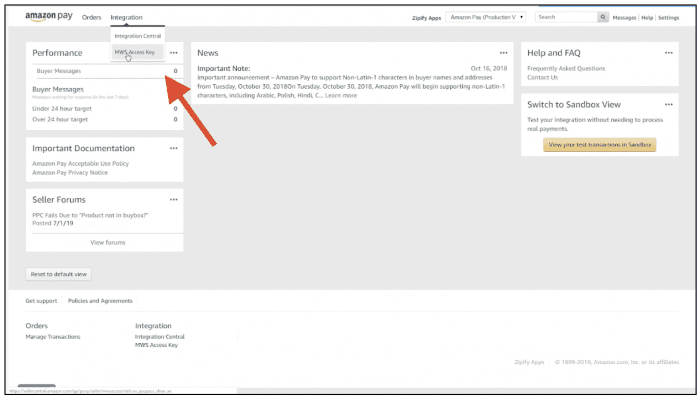
Then click on Integration and choose “MWS Access Key.”
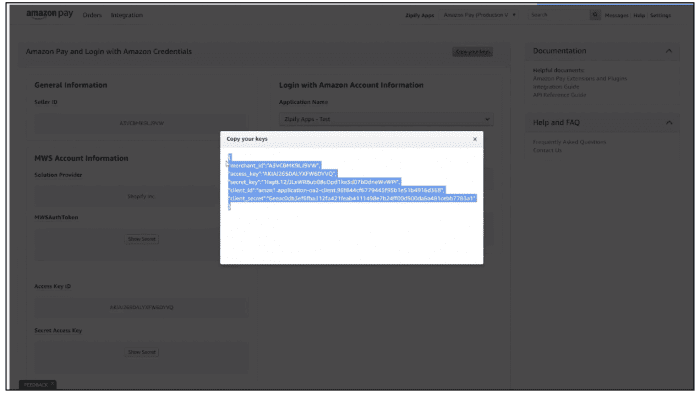
Click on the application you’ve just created and then copy your keys. You’ll need to copy all of the content in the pop-up.
Open OneCllickUpsell and navigate to the Payments tab. Under Amazon Pay, click to Import Keys. Paste your MWS Keys that you’ve just copied here. (Your keys will automatically populate in the appropriate fields.)
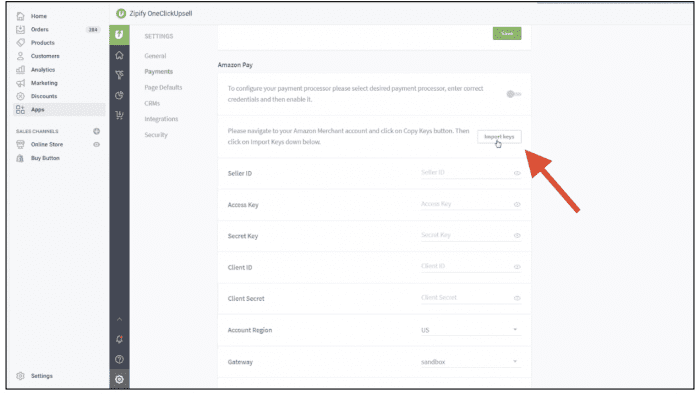
Set your account region and then click “Save”. Finally, enable the integration to complete the set up of Amazon Pay with OCU!
That’s it! Just remember to always run a test transaction on your store to make sure everything works.
3. Run a Test Transaction
Whenever you make a change to your checkout or anything that affects your customers’ ability to make payments, you should always run a test transaction to make sure everything is working properly.
Go to the front-end of your store, make a purchase using Amazon Pay and confirm that the purchase goes through properly.
(And if you make an actual payment, don’t forget to refund yourself!)
Get Started Now
That’s it! Amazon Pay is now set up on your OCU account.
If you’re an OCU user, just log into your account to get started with Amazon Pay.
If you’re not an OCU user and you want to offer one-click, post-purchase upsells on your Shopify store, visit zipify.com/oneclickupsell to start your membership.
I’m Brittany — thanks for reading!

